Wednesday, April 28, 2010

Progress Report!

Okay, so...... It's so close to done I can taste it! Well not literally taste it, but metaphorically taste it. I personally wouldn't recommend tasting wood, it tastes like wood.

I completed the top drawer, now cut down to size so it neatly slips underneath the glass and the piece of wood supporting the glass. The front panels of the two drawers have nicely fit in with a minimal gap between them and a minimal gap between the glass and the top of the drawer.

Only things left now are a selection of little things, puttying, staining, putting in some right angle to better support the glass, putting on some floor slides so it doesn't damage carpet, and then I think we're done. Yay!

Tuesday, April 20, 2010

Awesome Steampunk Mouse

Hi Guys,

I'm not sure if any of you are into steampunk, or know what steampunk is, but I just had to show you this awesome mouse. Basically steampunk is a particular style, with lots of pipes and brass and generally giving the whole thing a very vintage but also techy look. Anyways there's a pile of people out there that modify various items (anything, really) to give it a steampunk look. Here's a mouse that a guy did, and I reckon it looks awesome.
Anyways, the full pictorial details of how he did it are found here. I recommend doing a quick browse through the images he's put up, it's pretty cool. He's even gone to the effort of building it a beautiful display box for it to sit in. Not sure it'd be the easiest mouse in the world to use, but I don't care.

Cya people,
Bob

The TV Cabinet's Glass has Arrived!

It's here it's here! Hooray! Ok, so I measured up and bought the glass for the TV Cabinet's top. After that it's been a very simple job of cutting to size and screwing in a piece of wood that will run down the middle of the cabinet, just underneath the glass. Now the cabinet has a much better level of rigidity, and we can start to see how this thing is going to shape up.


The glass that I bought was clear (as you can see) as clear glass is substantially cheaper than frosted glass. Later we'll put some frosting contact that we'll get from Sal's dad's business, and that will frost it up nicely for us, whilst still being much cheaper than buying frosted glass up front.
Next job is cut down the top drawer so it'll fit under that cross-piece of wood, finish the top drawer off, then it's on to prettying-up measures like puttying and staining.

Cyas, Bob

Tuesday, April 13, 2010

The Fish Tank

Ok people,
I've had three comments on this blog so far, and two of them have expressed concern about the fish tank. I thought I'd put a few more details here about it to put minds at rest.

The tank will not be made out of glass. Glass is a much trickier substance to work with. Instead it will be made out of perspex. Perspex has many advantages in terms of fish tank building; it's stronger, clearer, can be easily drilled, is more thermally insulating, and is much lighter than glass. It also has almost exactly the same refractive index as water, so light does not bend when passing from perspex to water. The main disadvantage of perspex is it does tend to bow a bit more if you're not careful, and it scratches easier (although scratches can be buffed out of perspex, unlike glass).

Perspex is also easier to bond together than glass. By applying a solvent to the perspex, it actually melts slightly. Then when the solvent evaporates away you have a bond that is just as strong as a sheet of it, and is even clear! These bonds also never age and give way, unlike glass tanks, for which the joins are well known to weaken with age.

Another advantage I have for the perspex is that it can be cut using Greg's (Sally's Dad) larger router from his business. All I need to do is develop the template, stick the sheet on the bed, and the router will cut the whole thing out for me precisely and with perfectly straight edges. So the overall plan is to design the tank, decide on all the pieces I want cut, develop a template for the router, have all the pieces cut out of a single large sheet, and glue them all together.

Perspex tanks are recommended to have a roof on them, because it reinforces the top of the tank and prevents bowing. What I'm doing differently is that the tank will have a "chimney" up the back to allow access, and so that the water can come all the way up to the level of the perspex ceiling, allowing an unobstructed view through the top of the tank.

Don't worry Travis, I have considered the whole air issue. The tank is also going to have an integrated filtering system build into the back wall of the tank. There will also be a bubble rock in the filter, making sure plenty of oxygen will be absorbed into the water. There might also be another bubble rock in the main tank area, so don't sweat about dissolved air in the water.

Once I've finished the TV cabinet I'll be moving onto pondering the fish tank problem, I have plans here but they're pretty messy, I'll draw some better ones up and stick them up later. I'd just prefer the blog to focus on one project at a time.

Bye!

Brief Update

Hello Everyone!

Ok, I thought I'd just let you know what's happening. Well I started getting to work on the upper drawer, and it is most of the way finished, but I was having some troubles with it dropping off the rollers and sitting straight. I realised that the problem was that the two staples at either end were leaning out away from each other. (Sally may have helped in pointing that out, slightly)
So anyways, now the plan is to run a small piece of wood along the just underneath but down the middle of the pane of glass. This will hold the top of the staples the correct distance apart, give the whole thing a much better level of rigidity, and have the added bonus of supporting the glass along its length.

Unfortunately this means that there'll be a lot more at the top of the cabinet than I expected, and so I don't know exactly how deep that top drawer can be. I don't mind it being shallow, I just need to know how low all the extra stuff is going to come so I can make the drawer shallow enough to not hit any of it. This has the annoying side-effect that I kind of need the glass so I can figure all this out. So there I am right now, trying to get a piece of glass for my cabinet so I can build the stuff to support the glass so I can build the drawer to sit under the glass.

So in short, stuff has stalled slightly, but it will be progressing soon!

Wednesday, April 7, 2010

The TV Cabinet, Part 1

Well people, I promised you that shortly I would start posting about what I'm doing, so now I'm doing it. As I said in my first post, the thing that is top of my to-do list is to build a TV cabinet to replace the highly classy one that we currently have sitting in our living room:

As you can see it's a highly classy affair. Not only is it made out of FANTASTIC iron shelving suitable for a hardware store, the shelving has been painting a lovely shade of AWESOME BLACK, and actually consists of two separate low tables, which clearly doubles the AWESOME-ness.

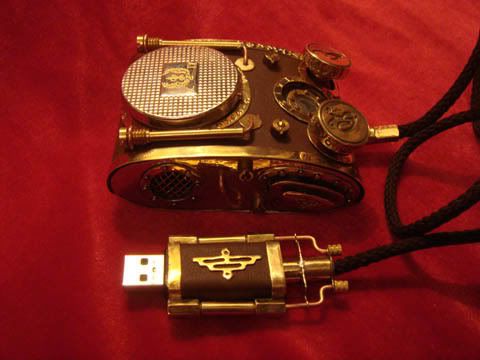
Next to it sits my wonderful radio, which I can actually describe as being awesome without being sarcastic or breaking my face.
Anyways, of the marbou wood that I built the coffee table with (yes, I'll put some coffee table pics up later), and the side table, I still had enough left I felt to put into the TV cabinet to give the whole room a nice consistency. Not enough for the whole thing though, so the design I came up with is as follows:

The design is straight forward, there's two staple-like shapes at either end, made out of my yummy marbou wood. In between is going to be some drawers made out of pine planks, which will be attached to a piece of ply wood that sits inside each staple. Sounds pretty straight-forward right?

The table top is going to be glass. At first we though clear, but at dad's suggestion, we think now that instead we'll go with an opaque glass, probably frosted, so that people can't see the garbage in the drawers.


Ok, STEP 1: Make staple thingies with piece of ply in the middle:


Well that was easy. The ply is held in by some nifty brackets I found at Bunnings: you can simple cut them into the size that you want.
Well, actually what you do is not so much cut them as attempt to cut them with not-very-suitable diamond pliers, then take your hammer and hit it repeatedly so you bend the bracket at the point you tried to cut it backwards and forwards about 3 or 4 times. This eventually means that the pathetic scratches you made with the pliers turn into breaks and you can then beat the bracket back to flat again with afore-mentioned hammer. If you haven't noticed, I am quite the fan of the flat-headed-kinetic-encourager.
The plywood has the nice side-effect of keeping these things nice and rigid and making sure everything is square.

STEP 2: join staples:
One piece of MDF does the trick, along with a few braces to give the thing a bit of rigidity. I know this isn't going to do the best job in the world, and it won't be the most rigid thing ever, but it does seem to do the trick ok. I may consider bolstering it with another piece of wood up the top later.

Ok, now it's drawer time! YAY!


Here's a couple of the bottom drawer being put
in.
The most important criteria for me for this bottom drawer is that it can fit a DVD case on it's side. As demonstrated by the Wii Play case, it does, YAY!


And that's it, that's where I'm up to. Next job is to put the second drawer in, but unfortunately it's been raining today so I couldn't get anything done today (Sally does not appreciate sawdust inside.) After that get the bits to support the glass, do all the little bits like puttying and staining and fitting handles to the drawers, and it'll be a lean mean TV-bearing machine.


Thursday, April 1, 2010

Hottest. Computer. Ever

Ooooooo!

I just found this site http://www.suissacomputers.com/. Those computers are so pretty they make me squeel like a little girl! and then wet myself with glee.

Glee smells funny. Kinda smells like urine.

I wonder if I can build something similar....... hhmmmmmm

Bob

The Beginning

Hi guys,

Ok, here's the deal. If none of you have noticed, I kind of enjoy building things. We have the coffee table to blame for that. Yes, the infamous coffee table, it was the beginning of many a project forming in my head.
Actually, now that I think about it, you could probably blame my early computer modding efforts, which pre-date the coffee table by several years. Hmmm, yeah lets blame those instead, because they are dead and gone, whilst the coffee table remains in all it's glory.

Regardless, I've decided that it would be fun to start blogging about these various things. I know very few of you are likely ever to read this, but I don't care. It's not about you anyways, it's about me, and my compulsive need to always either be building something, or think about building something, and so on and so forth.

So this blog will be dedicated to my creations. I plan on going back to my previous efforts and putting them up on this site as starting content. By earlier efforts I'm primarily referring to:
  • the coffee table made using computer circuitboards,
  • the matching side-table made using an alloy wheel my sister so thoughtfully destroyed,
  • the media-centre computer complete with speakers that has been built into a 1940s-era radio.

I will also keep you up to date on any projects I'm currently working on, as well as any plans I have for future projects. Just to give you a heads up, the current projects that are on the immediate plans are:
  • a low cabinet for the TV to sit on, built to match the coffee table and side table,
  • a fish tank made out of perspex with a clear ceiling that the water comes all the way up to.

And more long distance plans are:
  • the modular bookshelf inspired by childrens' building blocks,
  • the orrery/low table. (yes, that one is a way down the track)

So strap yourselves in and hopefully I'll have some pictures up for you detailing my work, my plans, and my previous creations.

Have fun,
Bob